Ciaté Mini Mani #1 — Cupcake Queen

ciate_cupcake queen_pose Now I know that when I posted about my gorgeous Ciaté Mini Mani Month box, I claimed I'd do a manicure a day... Welp. That obviously hasn't happened — but wait, there's a reason, I swear!

It's because the colors have been on the demure side. Don't get me wrong, I love a good pink or bordeaux, but I've been in the mood for some unusual nail colors and none of the mini bottles have been getting my wheels a-turning, aside from Numero Uno.

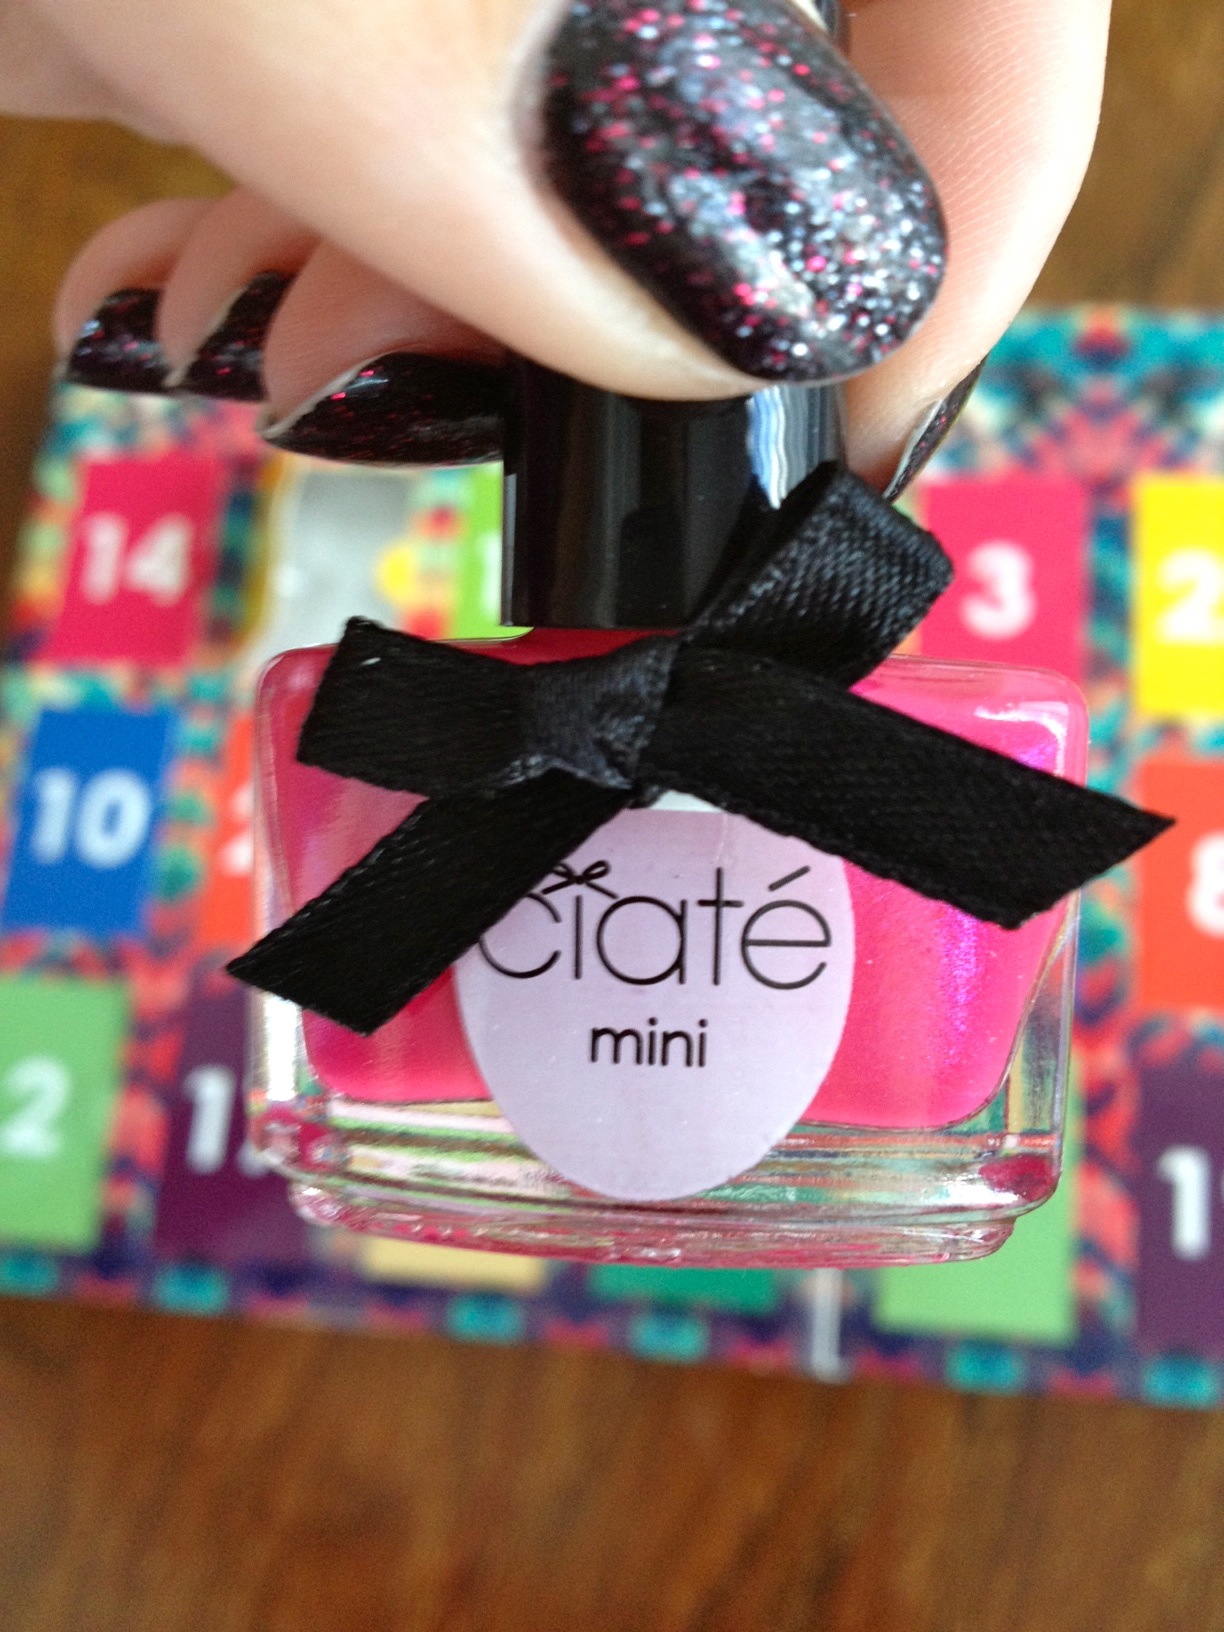
The first bottle to be revealed was Cupcake Queen, a bright magenta with (gasp) a violet sheen. It was totally late 80s. I think Barbie may have had a Corvette or two like this. It didn't scream sophistication, to be sure. Cupcake Queen? Maybe. But think Hostess, not Sprinkles.

Just look at how cute these little bottles are.

See that shimmer? When I see colors like this, I just... Phew. Flashbacks. I didn't know colors like this still existed.

And yet the pink looked bright enough for a look I'd been meaning to try — freehand leopard spots! I was inspired by this page in a Sephora catalog that I've been hoarding for a year and a half. /wink

My inspiration. My tools.

Here's my left paw in the shade.

And some early morning California sunshine.

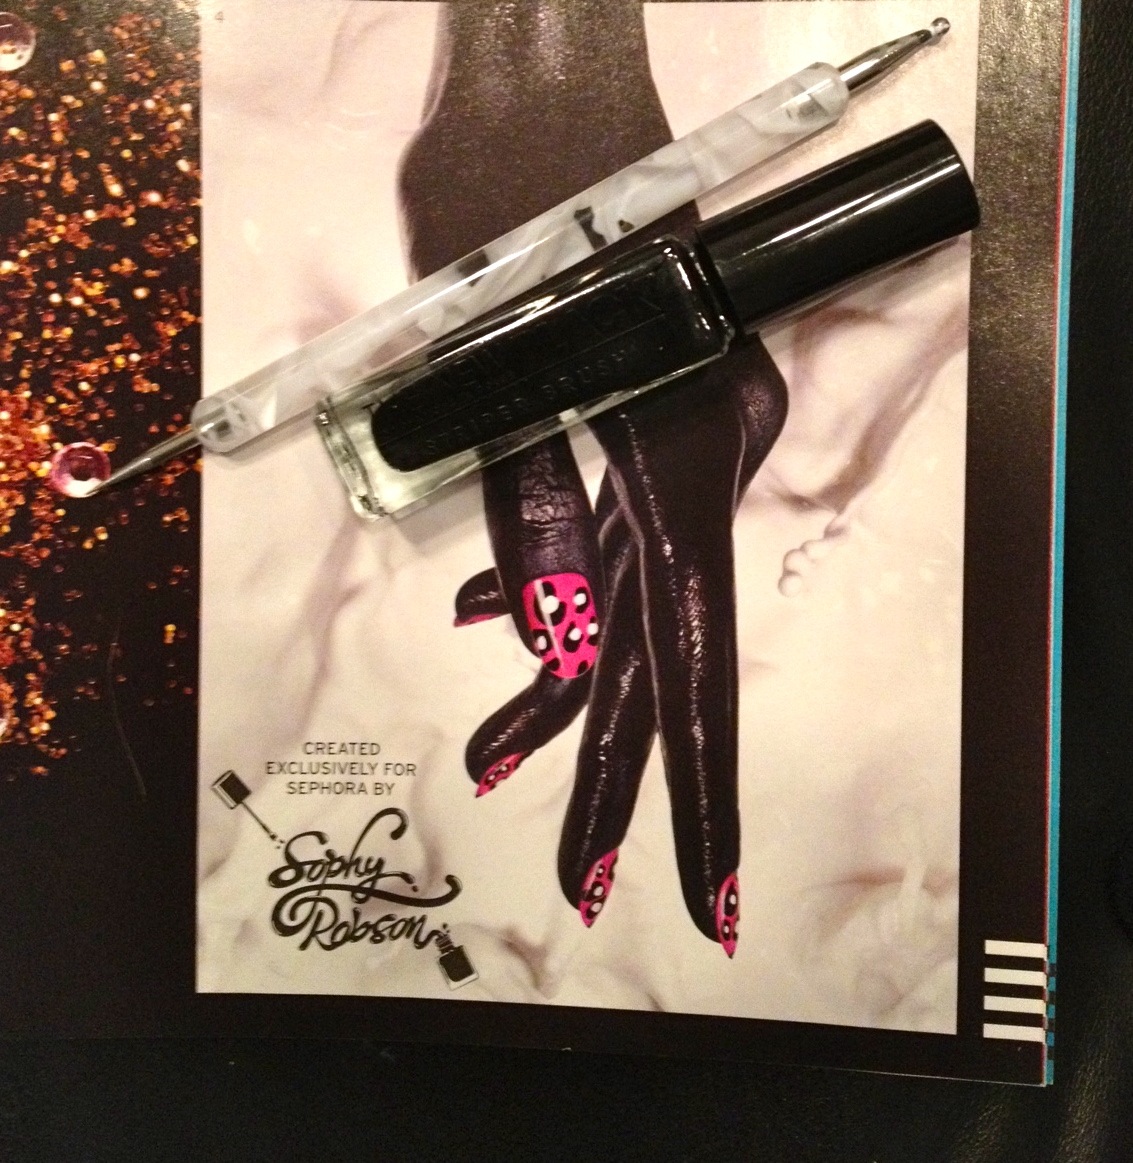
These spots were incredibly easy to do! All you need is a dotting tool (or even a bobby pin) and a good black striping polish.

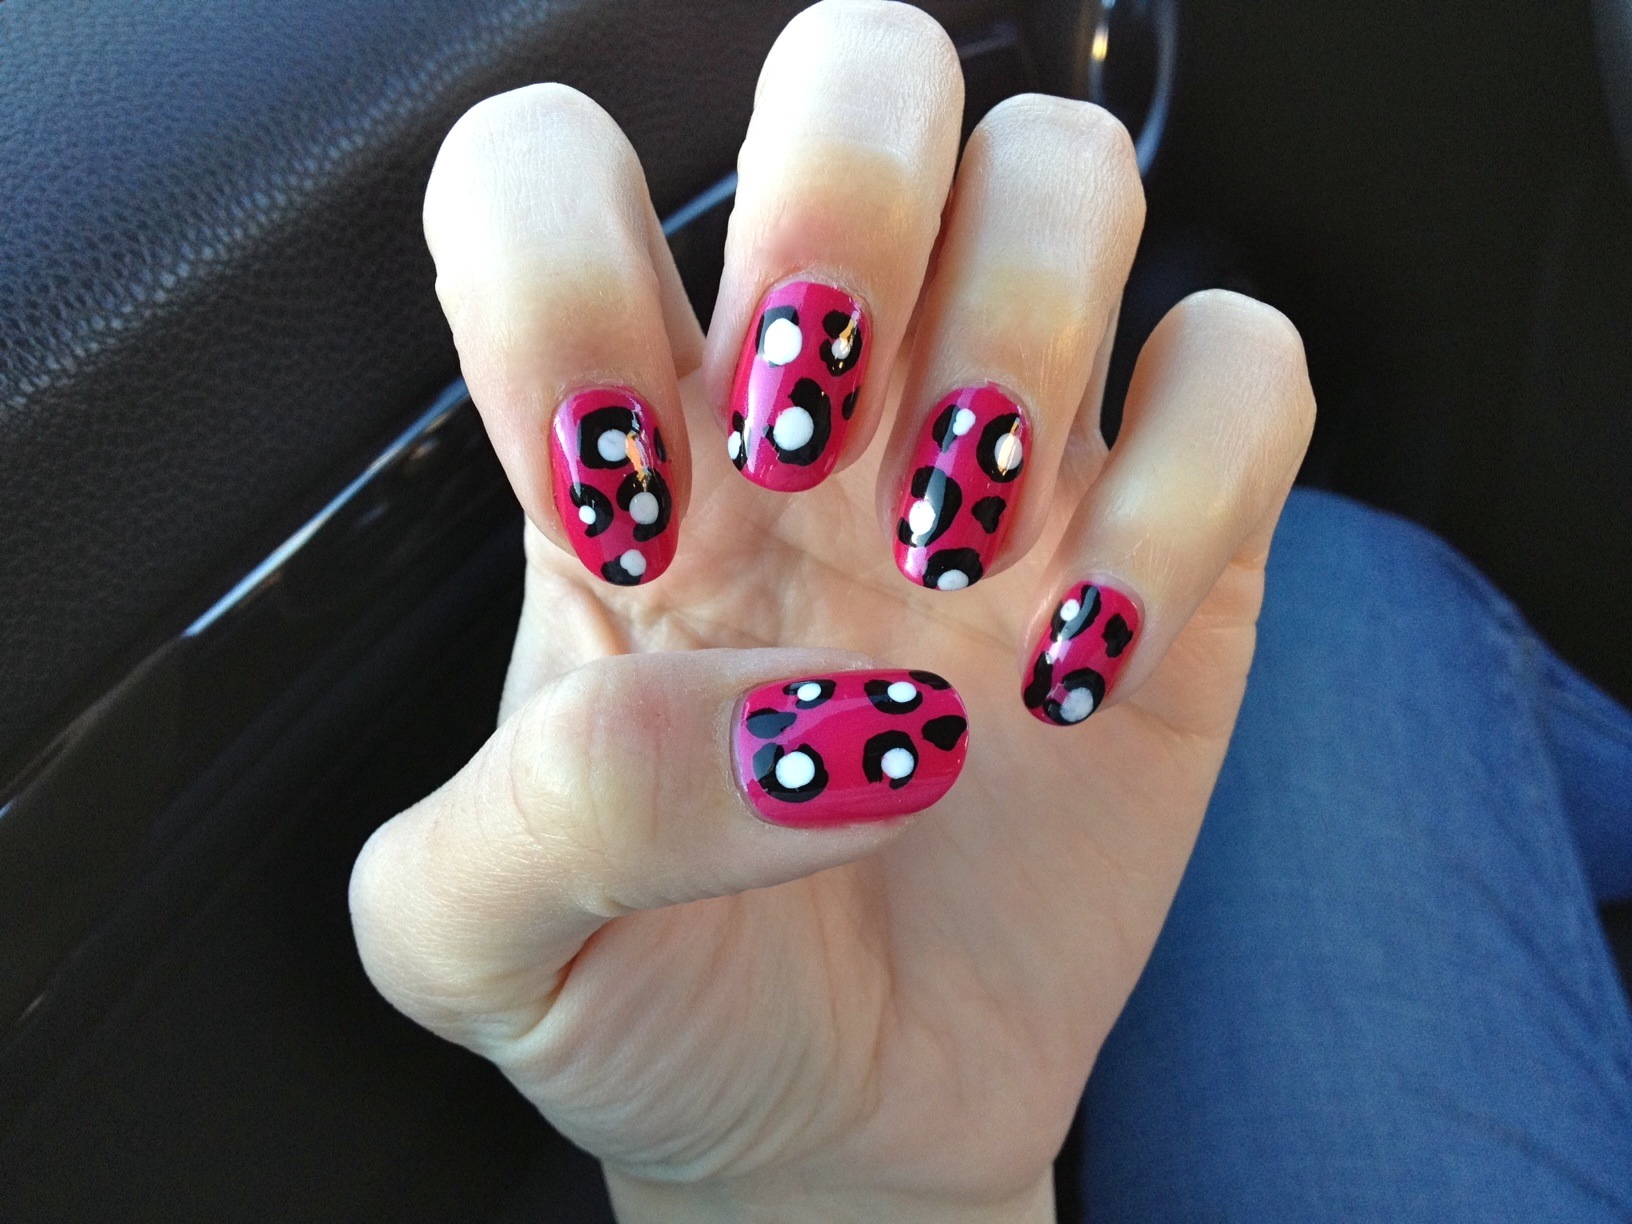
I used a black striping polish from The New Black. What a great buy; the polish is pigment-rich, super smooth and even dries pretty fast. The brush itself is perfect, too. Using the brush, I drew little half moons and circles, being sure to make the edges of the moons and circles a bit wobbly and uneven looking so that they'd look like stylized leopard spots instead of straight-up polka dots. The organic look we're going for really comes in handy when it's time to paint your non-dominant paw. ;)

Then I used my dotting tool and my Konad white stamping polish to add small white dots in varying sizes on most (but not all) of my black half moons and circles. I nearly reached for my trusty OPI Alpine Snow, but I was worried about transparency issues — and nothing's more opaque than Konad.

I enjoyed this look so much that I couldn't bear to remove it the next night! Or the night after that. So now you've discovered the second reason why my manicure-a-day plan didn't make the cut.

quitethecupcakequeen, Francesca

Manicure Mania, Pt. IV: French Tip, Blown to Bits

The reality of DIY nail art is that sometimes... sometimes... things don't work out. I've attempted works of art that seemed like a genius idea in theory — only to find that, in practice, good ideas don't always equal great nails. For example, I thought this gorgeous Illamasqua nail polish that my friend Alison gave me, Kink, would look awesome with feathers on it.

Feather FAIL.

When I heard that MAC was offering new & improved, on-trend press-on nails (!) I raced to my compy to see what they'd dreamed up. And I saw this:

What beauty! I loved it! So crisp and clean! I thought a pale lavender would suit my wardrobe better, so I grabbed Revlon's Lily and my ol' faithful, Sally Hansen Black Heart, then I set to work.

First, two coats of Revlon Lily. Next, I used french tip tape and gave myself black tips. Easy enough. Then I used ring enforcers to create a black half moon at the cuticle. And here's where I went wrong. Partly an issue of impatience, and partly due to the fact that I was really sick with a sinus infection and in a stage of delirium, the half moons were a mess.

I felt too ill to start again and, so help me GAH, I was not going to let my nails go naked. There was only one product I could turn to; only one polish that could cover oh, so many sins: SHATTER.

My favorite crackle polish is by OPI, who calls it "shatter." If you apply a thin coat, you get tiny little cracks. Apply a thick coat for great, big dramatic fissures.

I thought this mani was dead for sure but, like a phoenix, it rose triumphantly from the ashes of carelessness to emerge as the shiny, eye-catching mani I knew it could be.

shattercracklepop, Francesca

Manicure Mania, Pt. III: Glitter Gradient

And so we continue with the mayhem that is Mani MANIA! Next up is a look that's incredibly easy to do and guaranteed to get the nod of approval (or even the ole eyebrow-raise of astonishment) from all of your pals: The Glitter Gradient.

First, pictures:

And now, here's how to do your own Glitter Gradient.

  • I first had to comb through my Stash for some good glitter / base color combos. You'll need to do the same. What we're trying to achieve is a pairing that is pleasing to the eye — but it can't be too matchy-matchy or else the glitter fade will be difficult to detect. Nor can it be too contrasty; too distracting. Eventually, I settled on two polishes that looked great together: ORLY Pixie Dust, a lavender-gray hybrid with teensy specks of silver microglitter, and Nubar Pink Glitter, a pretty shade of pink that's more sparkling rosé than bubblegum.
  • Next, I did my usual Essie base coat, followed by two coats of ORLY Pixie Dust. I let the polish dry down a little and watched a scintillating half hour of Pawn Stars. (That show gets me every time!!)
  • And now, the fun part. GLITTAH. Do not shake the bottle. With a lot of glitters, you'll notice that the glitter sinks ever-so-slightly, leaving the bottom of the bottle very dense with glitter and the upper part of the bottle with fewer glitter particles. Carefully remove the brush from the bottle. We want to dip into the very top of the polish, the part that is mostly clear polish with only some bits of glitter here and there.
  • Then, paint about 75% of your nail with this diluted glitter formula. Don't go straight across; kind of move your brush like a zizag at the top, to avoid a clear line of demarcation between glitter and no-glitter on your nail.
  • Okay, now give that bottle a decent shake (like how you'd shake a bottle of milk). This will stir up the glitter and give you a more concentrated glitter mixture to paint with. Now paint 50% of your nails with this shaken-not-stirred polish. Use the same zigzag strategy.
  • One more step! Shake, shake, SHAKE. I mean really shake it (like when you were in second grade, and you brought in small glass baby food jars and added cream and then shook it the entire day to make butter). Get the glitter as mixed up as you can! This will give you GLITTERO MAXIMO. Paint just the tips of your nails, say the bottom 25%.
  • Top it off with your favorite top coat and BAM! Sparkle fingers FTW!

sparkleandshine, Francesca

Green Bling — Happy St. Patty's Day!

Tomorrow is St. Patty's Day!

Honestly, I am not quite sure why we celebrate this holiday or why we celebrate it on its designated day.  St. Patty's Day just appears to be a good day to socialize, wear green, and drink beer.....at least that's what I've heard (can't remember the last time I celebrated St. Patty's Day).

So, I am joining in the festivities this year with some fabulous green, blinged out nails!

This is my first 3D nail, and let me tell you, I have some serious reservations about 3D nails.  Mostly, they are just WAY too much for me, gaudy, and sometimes incredibly unsophisticated.  Not to harp on 3D nails too much, but I don't really think they are meant for working professionals in their late 20's, ya know?!

So, I am attempting a serious compromise here with a 3D ringer (if you don't remember what a "ringer" is, please read here).

These nails are still loud and gaudy, but much more toned down than most 3D nails I have seen.  Compromise.

Also, I would like to note that I will not be wearing these to work....they are only for the St. Patty's Day weekend.

First, I started with a base coat.  Then I painted one thick coat of Wet n' Wild Spoiled's I Only Eat Salad, which is surprisingly opaque and quite nice after just one coat.

Then I covered my nails in one coat of Milani Neon's Totally 80's, just for a brighter pop of green.

I have to say I am rather sad out Milani Neon's Totally 80's, which is not neon at all.  It's just a bright green, and I was really hoping for a neon green :(  Oh well.

Now for the 3D effect, you will need rhinestones, a toothpick, water, and your top coat.

Once your nails are completely dry, paint a top coat on one ring finger.  Then, while still wet, use a wet toothpick to carefully place the rhinestones on your ring finger.  Once all your rhinestones are in place, then coat the entire nail in another layer of top coat.  Make sure to let dry completely.

Super fun and perfect for a St. Patty's celebration!

Have fun with your green nails and beer and remember to be safe!

 -kissmeimirish, Varnish

Blue Period — Ikat

According to WikIpedia, Ikat is a dyeing technique used to pattern textiles that employs a resist dyeing process similar to tie-dye on either the warp or weft fibres. This is a very popular print in textiles and upholstery:

But, if you are anything like me, you probably are more familiar with the ikat fabrics that have been gracing the runway:

I did some research on ikat nails, as all good homemade manicurists do, and I was able to find these super fun ikat nails made by other homemade manicurists:

(by concreteandnailpolish)

(by chaoticwithin)

(From refinery29)

(by Mr. Candiipants.  You can watch a video for them here.)

Or if you prefer, try this ikat print nail sticker by ncLA:

My inspiration for this next blue manicure, is this amazing ikat dress work by Heidi Klum:

First, here are the tools you will need to complete your ikat nail:

Cover nails in base coats and let dry.  Then cover nails in two coats of Sinful Colors' Snow Me White and let dry completely:

Then using a fine tip paint brush and Loreal's Jet Set To Paris, carefully and creatively paint on some fun blue shapes:

I can't really describe the shapes here, so just follow these photos for inspiration:

Make sure these are dry before moving onto the next step, which requires Sally Hansen's Nail Art Pen in Bright Blue and Black:

Using the Bright Blue pen first, following with the Black pen, make short and small dashes around the larger blue shapes you just painted.  Again, I can't really describe this, so just check out the pics.  You really cannot mess this us, so just have fun!

Let dry completely, and I mean COMPLETELY, before putting on your top coat.  These pens are tricky and they will bleed hours later when applying the top coat.  I suggesting going to bed and then applying your top coat in the morning.

Honestly, these are my new favorite nails.  I cannot get enough of them!

Special thanks to my hand model, Jana!  Meow!

(Proper placement of ikat and baby snow leopard....for effect, of course!) 

XOXO- Varnish